

How It Works
Follow these steps
from Sign-up to Service Usage
Campaign management is one of AUTOSEED's key features, allowing you to send messages to influencers, manage responses, and analyze performance. Campaigns are created, sent, and managed in stages, and the entire process takes place in a unified system.
Create Campaign
Campaigns are created in the following order.
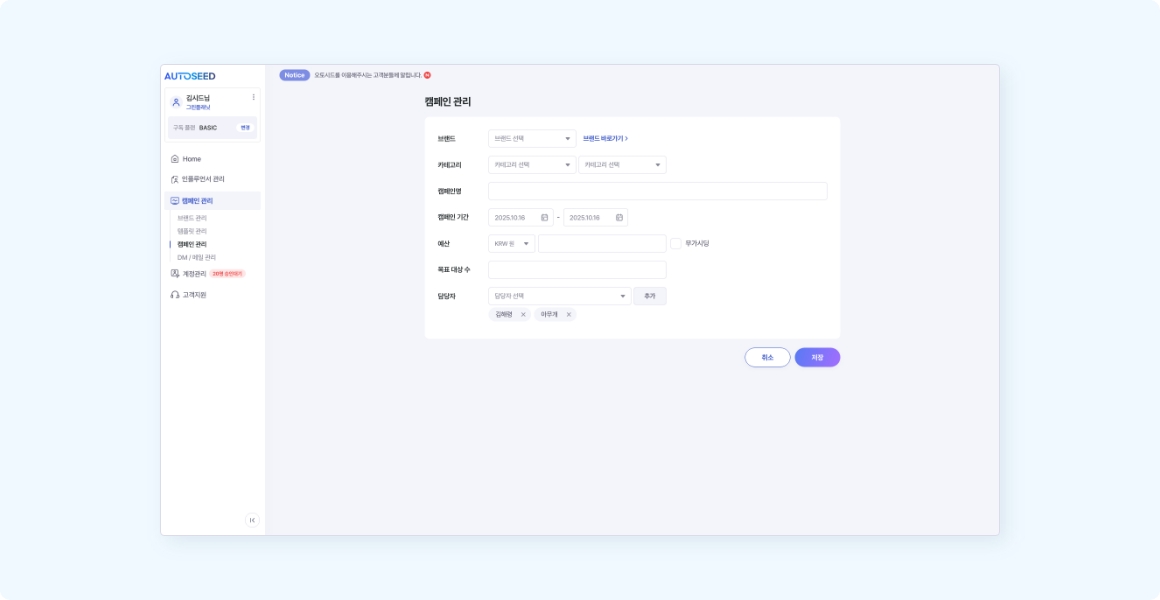
1Enter Campaign Info
- Enter campaign name, description, and objectives.
- Specify a brand to categorize campaigns if necessary.
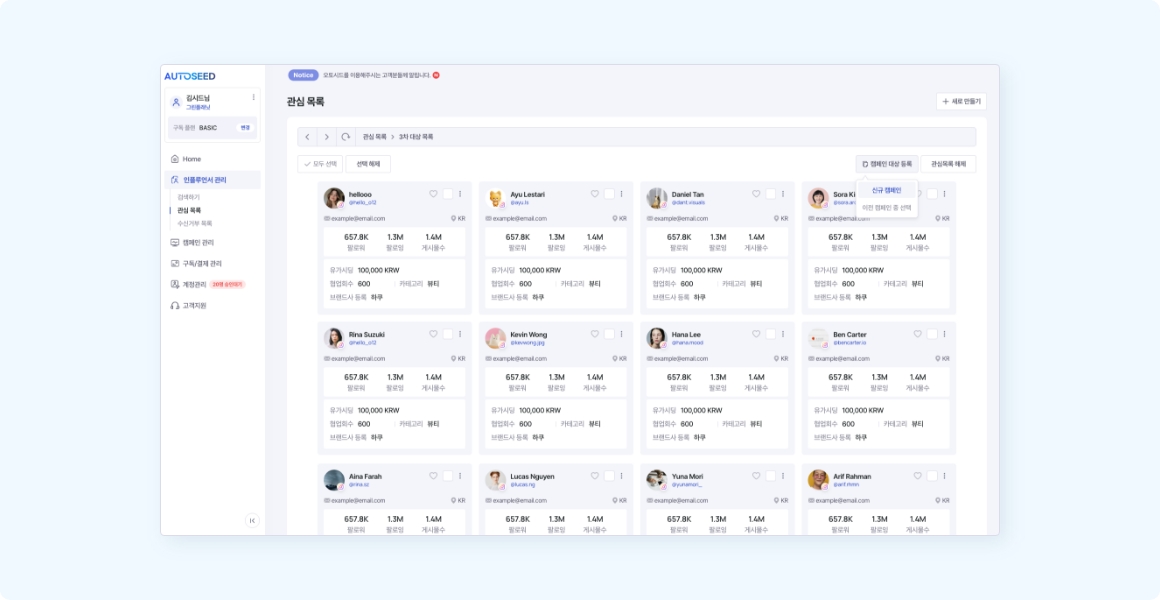
2Select Target Influencers
- Select directly from search results, or load influencers saved in your wishlist/recommendations.
- Selected influencers are registered as pending candidates. You can select an existing campaign or create a new one on the fly.
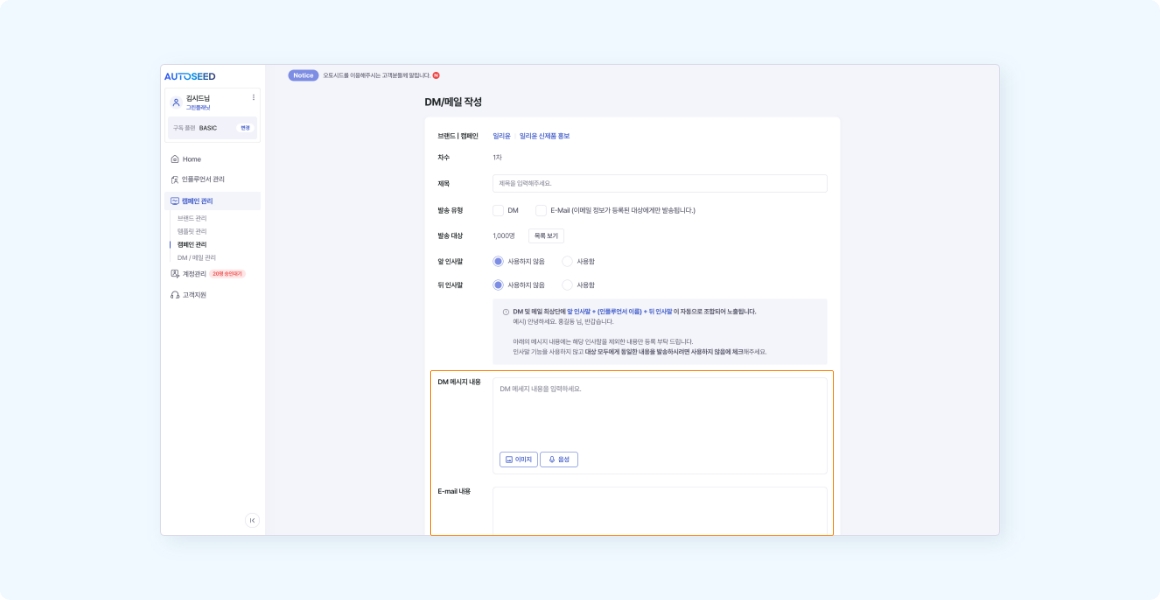
3Write Messages
- Write channel-specific messages (Email, DM).
- Load saved templates or edit existing ones. * Refer to 6.2 Template Management for details.
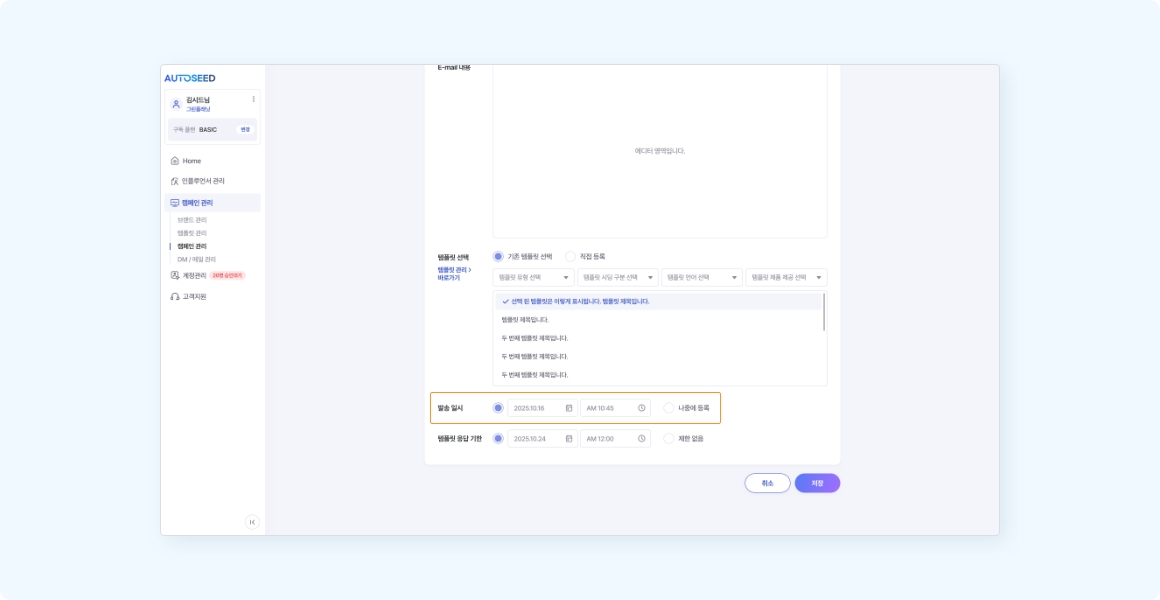
4Dispatch Settings
- Select message dispatch time. We recommend scheduling at least 1 hour later to review content.
- Saved messages can be previewed. Links to templates and unsubscribe options are added automatically.
Manage Campaign Status
Once sent, you can monitor campaign progress.
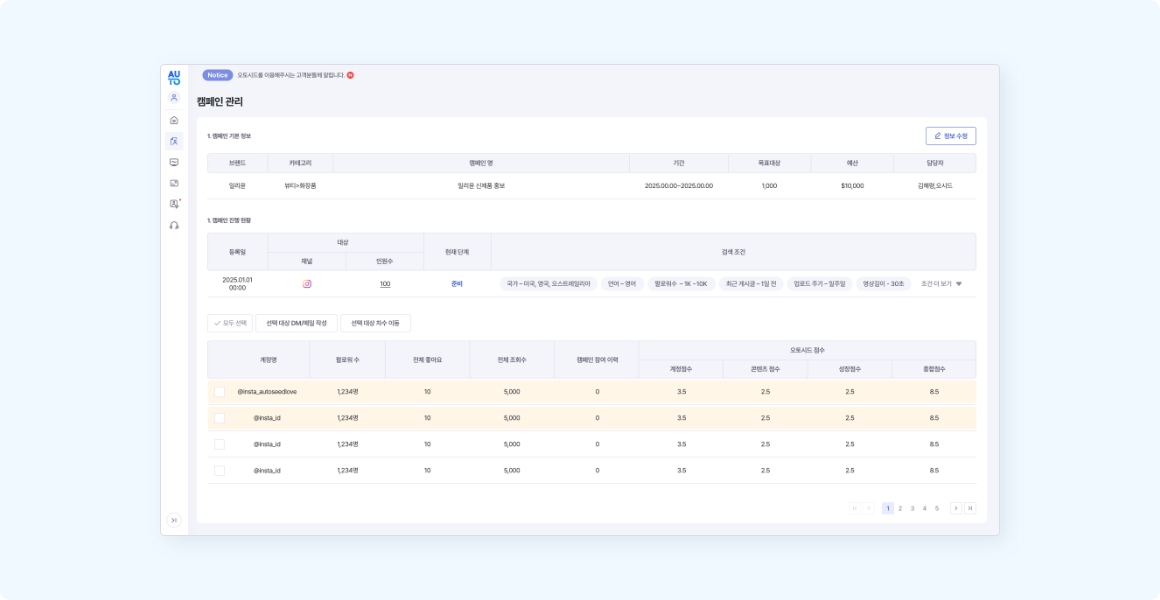
1Pending List
List of influencers added from searches. Clicking the pending step count on the campaign details page redirects here. Displays the registration date and search criteria. Influencers who have not received any message yet show on top; saving a message for them immediately promotes them to Phase 1. You can also manually promote/demote users using step shifts.
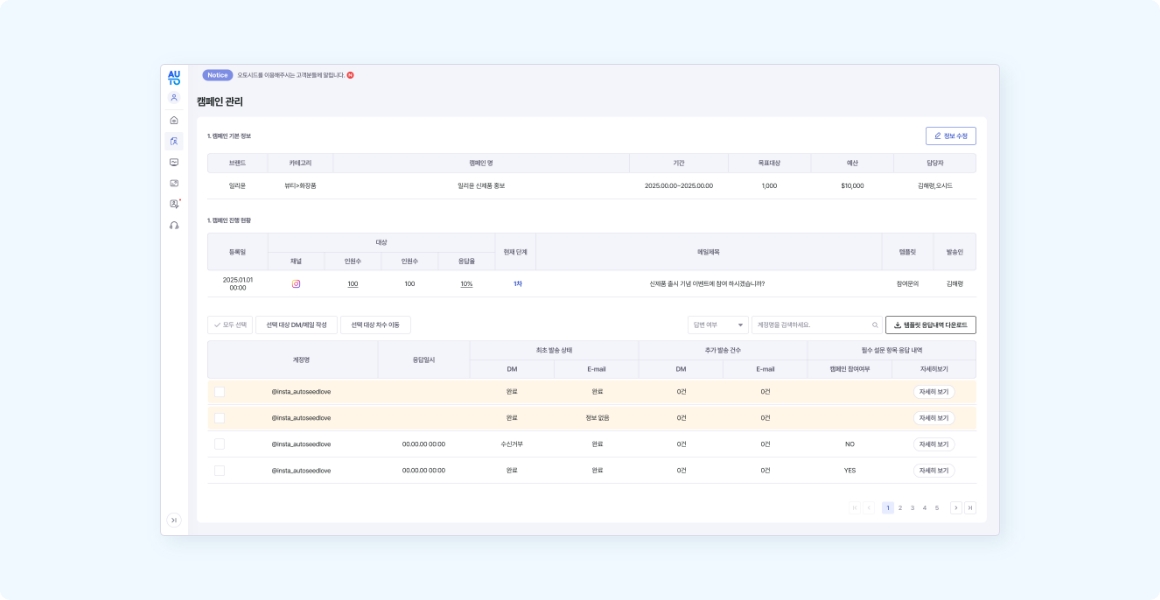
2Phase 1 List
Once the first message is sent, targets enter the Phase 1 list. The 'New' badge indicates influencers who clicked the 'Submit Response' button in the template. Response is possible even without filling optional fields. You can click 'View Survey Response' to check replies, or send additional messages. Extra messages show in 'Additional Dispatches'. Moving targets to subsequent phases does not remove them from past phases; instead, progress records are accumulated.
3Phase 2 List
Targets who responded 'Yes' to collaboration enter the Phase 2 list. The 'New' badge is managed by template submissions. Progress is accumulated while target counts remain in past steps.
4Phase 3 List
Targets who submitted their shipping address enter the Phase 3 list. 'New' represents new submissions. Excel downloads containing all responses are available at this stage.
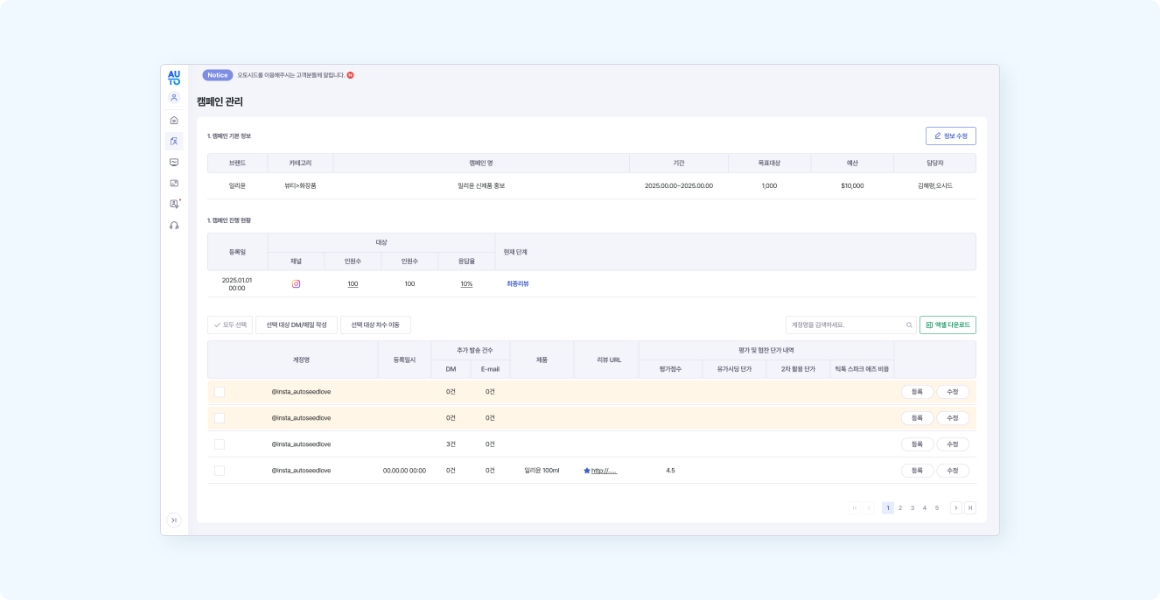
5Final Review
Promoted manually from Phase 3. Here you review and manage evaluation scores and seeding costs. 'New' indicates pending evaluations. Top progress summaries display registration date, target/response counts, and current stage.